Is your beautiful balcony prone to water damage? A dripping balcony is more than an annoyance—it can lead to serious structural issues, expensive repairs, and dangerous mold growth. Remodeling or building new, waterproofing ahead of tiling is the critical step many homeowners neglect, only to wish they had done it when the first torrential rain exposes the costly mistake.
Don’t make your outdoor oasis a water disaster! ???? The difference between DIY and pro outcome hinges on knowing the proper methods and using high-quality products. Your balcony should have waterproofing that lasts years, not months. When you waterproof correctly, you can have a stunning, functional space that withstands whatever comes your way.
In this guide, we will take you through 9 expert tips for waterproofing your balcony before the installation of such beautiful tiles. Right from initial surface preparation until the selection of a perfect waterproofing membrane, here you’ll get all the things you require in order to design a watertight base that protects your investment and brings a sense of assurance.
Why Waterproofing Your Balcony Is Necessary Before Tiling
Your balcony must be a peaceful sanctuary, not a hidden waterland waiting to happen. Skipping waterproofing can save time in the short run, but it’s a risk with costly repercussions—think cracked tiles, soggy ceilings, and crumbling concrete. A good waterproofing layer is like an invisible shield, keeping water out and protecting your home’s structure from silent, slow decay.
In addition to structural damage, retained moisture welcomes mold and mildew, transforming your lovely outdoor area into a slippery, unhealthy risk. Waterproofing isn’t merely a matter of toughness—it’s a matter of confidence. Invest upfront to prevent a lifetime of repairs, and relish a balcony that remains spotless for years to come.
Prevents water damage and structural damage
Skip waterproofing your balcony, and you’re basically inviting water to throw a wild party in your home. Water doesn’t just stop at the surface – it seeps into tiny cracks, infiltrates concrete, and causes havoc behind closed doors. When water infiltrates your balcony structure, it can destroy concrete, corrode reinforcement bars, and compromise the entire foundation.
Picture this: you’ve just spent thousands on lovely new tiles, only to discover your downstairs ceiling with mysterious brown stains. That’s water damage announcing itself. By applying effective balcony waterproofing before tiling, you’re forming an impermeable barrier that keeps water from penetrating where it shouldn’t – inside.
Prevents mold and mildew growth
Nothing ruins alfresco pleasure more rapidly than traipsing over onto a mold-encrusted green balcony. The wetness that accrues between tiles and concrete is precisely the kind that mold and mildew crave most. Such mushrooms are not attractive – they are health hazards, inducing allergy and respiratory conditions.
With the proper installation of waterproofing membranes, you eliminate the dampness upon which these organisms rely for their survival. Your balcony stays spick-and-span, healthy, and ready to host those sun-kissed summer barbecues.
Protect your home with a professional Balcony Waterproofing Service in Singapore for best-in-class mold prevention and moisture control.
Extends the lifespan of your balcony
Think of balcony waterproofing as an insurance policy for your outdoor space. A proper waterproofing system greatly extends the lifespan of your balcony, preserving your investment for years to come.
Without it, you’re looking at costly repairs every few years – tile removal, fixing concrete damage, and drainage issues over and over. The arithmetic is simple: spend a little on proper DIY balcony waterproofing now, or spend much more to fix later. Your future self will thank you.
If your balcony includes a tiled roof, consider a Tiles Roof Waterproofing Service in Singapore to maintain both aesthetics and function for the long haul.
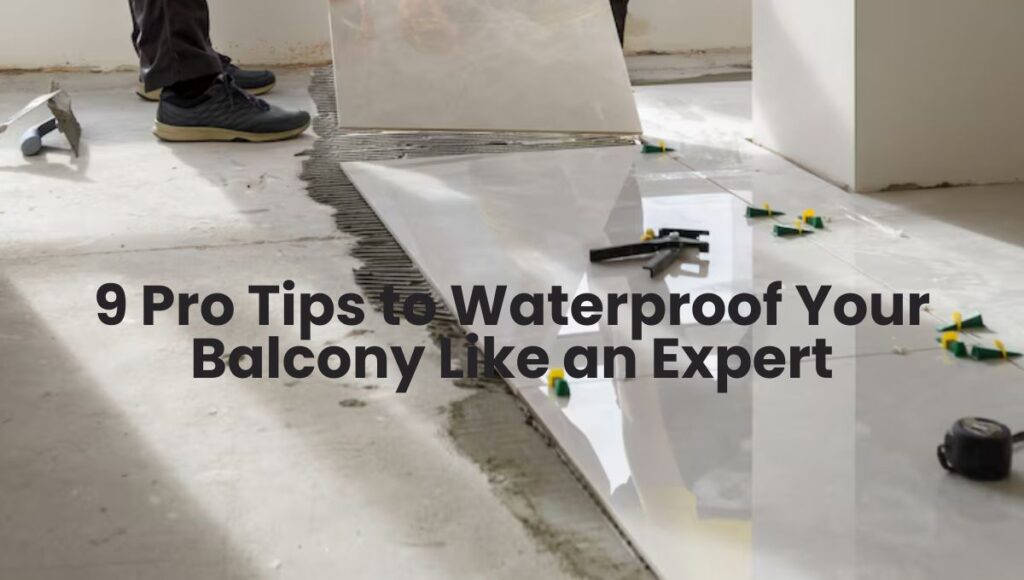
9 Pro Tips to Waterproof Your Balcony Like an Expert
A drippy balcony can lead to costly damage—discolored ceilings, rotting buildings, and even mold infestation. But with the proper approach, you can seal your outdoor space like a pro.
Whether you are a DIY expert or going to contract someone, these tips from the pros will help you waterproof your balcony efficiently and avoid common pitfalls.
From choosing the right membrane to providing proper drainage, each step is critical to excluding water forever. Follow this guide, and your balcony will be dry, durable, and ready to roll for years to come!
1. Inspect & Repair the Base Surface First
Before you even think of applying waterproofing materials, examine your balcony surface thoroughly. Check for cracks, holes, or any other form of damage that would compromise your waterproofing efforts. Even tiny hairline cracks can become major leakage points in the long term.
Take out a flashlight and inspect each inch. Use an appropriate concrete filler or epoxy to seal up any cracks. With more serious damage, you might need to fill with a concrete repair compound. Your waterproofing is only as good as the surface you apply it to, after all!
2. Choose the Correct Waterproofing Membrane
Not all waterproofing membranes are created equal, especially for balconies. You’re going to want something that will hold up to foot traffic, temperature changes, and UV exposure.
Options are:
- Liquid-applied membranes: Easy to install, perfect for complex shapes
- Sheet membranes: Durable and even thickness
- Cementitious waterproofing: Good for concrete balconies
Choose one designed for outdoor conditions and compatible with tile adhesives. Or better yet, consult a Waterproofing Specialist in Singapore for the best membrane for your project.
3. Slope the Surface to Drain Correctly
Water buildup is the nemesis! Your balcony needs to have a slight slope (about 1:100) towards drainage points.
If you have a sloping balcony, you will need to construct this slope with a screed layer initially and then waterproof it. Water is automatically pushed away from your building rather than resting on the surface or, worse yet, being pushed in the direction of your house.
4. Utilize a High-Grade Primer
Primer can be equated to the middleman between your balcony surface and waterproofing membrane. It creates the perfect marriage.
Apply a suitable primer to brush the whole surface. This improves adhesion and prevents the waterproofing membrane from peeling off later. Don’t forget corners and edges—these are weak spots!
5. Seal All Joints & Edges Correctly
Transitions and joints are the soft spots in your waterproofing armor. Seal them with waterproofing tape or fabric reinforcement at:
- Wall-floor transition points
- Drains and pipes
- Expansion joints
- Corners (internal and external)
Press the reinforcing material firmly into a fresh layer of waterproofing compound, followed by another layer. This forms a flexible, watertight seal that accommodates movement without cracking.
6. Use a Liquid Waterproofing Coating for Full Coverage
Liquid waterproofing coatings are particularly suitable for balconies because they form a seamless membrane. Use at least two coats in perpendicular directions (use the second coat at a 90° angle to the first).
Wait for the advised drying time between coats. Do not hurry this process—proper curing between coats guarantees a total waterproof layer. Apply large areas with a roller and edges and corners with a brush.
7. Install a Drainage System (If Necessary)
In bigger balconies, install an appropriate drainage system. Choices are:
- Linear drains along the edge of the balcony
- Point drains at strategic points
- Drainage mats under tiles
These systems help in diverting water away effectively, reducing pressure on your waterproofing membrane, and repelling water.
8. Let Waterproofing Completely Cure Before Tiling
Patience is a virtue when it comes to waterproofing. Allow your membrane to fully cure before tiling. This will typically take 24-72 hours, depending on the product and environment.
Hurry here can lock water in beneath your tiles, leading to efflorescence, mold, or waterproofing failure. Verify the manufacturer’s recommendations for precise curing times.
9. Inspect for Weak Spots Before Completing
Avoid hasty tiling over your waterproofing. Test it first with a water test by plugging the drain and flooding your balcony with roughly 2 inches of water for 24-48 hours.
Mark any damp spots that appear on the underside (if accessible). These indicate leaks that need fixing before you proceed. It’s much easier to fix problems now than after tiling!
Conclusion
Waterproofing your balcony before tiling is not a recommendation—it’s a requirement that will save your investment and lengthen the life of your outdoor space. Having followed these nine expert tips, you now understand how to properly prepare the surface, select the correct materials, and apply waterproofing membranes correctly. Remember that taking things slowly and methodically at every step, particularly allowing adequate drying time, will prevent costly repairs down the line.
Your new waterproofed and tiled balcony will now be weatherproof, preventing water damage, structural damage, and mold growth. To achieve the best results, maintain your balcony with regular inspections and prompt repairs when needed. Whether you do it yourself or contract with a company like Capital Deck and Stair Waterproofing, your effort to properly waterproof before tiling will pay off in the form of a beautiful, long-term outdoor living space that you can enjoy for many years.