
Bathroom leaks are one of the most common — and most frustrating — problems homeowners in Singapore face. They damage tiles, walls, and ceilings, and in HDB flats they can even spread to your neighbour’s unit below. If water has already reached a ceiling, a ceiling leakage repair may be needed as well. Knowing how to fix bathroom water leakage effectively, what causes it, how long proper waterproofing takes, and which mistakes to avoid can save you thousands of dollars in repeat repairs.
This guide brings together everything you need to know about bathroom waterproofing and leak repair in Singapore: how to spot the early signs, what causes leaks, how to fix them (with and without removing tiles), hidden HDB-specific issues, toilet-specific leaks, common mistakes, how long the work takes, and when to call a professional.
Signs of Bathroom Water Leakage
Leaking water is not always obvious. Sometimes it is hidden behind tiles or under the floor. Watch out for these signs:
- Water stains on ceilings or walls: Yellow or brown patches often mean a leak from the bathroom above.
- Peeling paint or wallpaper: Moisture makes paint bubble and peel.
- Mould or mildew growth: Black or green spots often mean water is trapped somewhere — our mold after a leak guide covers safe cleanup.
- Loose or hollow-sounding tiles: Tiles that sound empty when tapped may hide water underneath.
- Puddles around fixtures: Water pooling near the toilet, shower, or sink is a clear sign.
- Musty smell: A constant damp smell can indicate hidden leaks.
- Tiles that sound drummy, bubbling paint on the ceiling below, or a persistent musty odour can also mean the waterproofing membrane itself has failed, even if the surface still looks fine.
What Needs to Be Waterproofed in a Bathroom
Whether you’re renovating or building a new bathroom, it helps to know exactly which parts need proper waterproofing:
- Taps and faucets: Every fixture should be caulked with waterproof sealant so leaks don’t travel into the underlay of the sink or counter.
- Bathtubs and shower skirting: These must be fully caulked so condensation and shower spray don’t soak into the walls and cause mould.
- Flooring: Tiles should be professionally laid over a proper waterproofing membrane, with grout work done correctly to stop water seeping through to the sub-floor.
- Toilet fixing: An often-missed area — make sure all fixings are tight when a new toilet is installed, since a slow, unnoticed drip causes flooring damage over time.
Why Bathroom Waterproofing Matters
Beyond stopping leaks, proper waterproofing protects your home in several ways:
- Prevents damp and mould: A waterproofing membrane or epoxy stops water from reaching the plaster and plywood behind your tiles, preventing rot and mould before it starts.
- Stops leaks from spreading: Water always finds the easiest path downward. Sealing weak points and gaps in the sealant between walls and floors stops water seeping into ceilings and light fixtures below.
- Provides insulation: A waterproofed bathroom acts as a thermal barrier, keeping external walls warmer and reducing energy bills.
- Increases property value: A bathroom with no history of leaks or water damage is a strong selling point when valuing or marketing a property in Singapore.
- Opens up design options: Once the waterproofing layer is solid, you have the freedom to add features like a concealed cistern, wall-hung basin, or open wet-room style shower.
Common Causes of Bathroom Leaks
Understanding the source is the first step to fixing a leak. Common causes in Singapore bathrooms include:
- Ageing waterproofing membrane: The layer under the tiles can crack over time, especially past 10–15 years.
- Failed grout or silicone seals: Old or missing sealant lets water seep through.
- Leaky pipes: Pipes hidden in walls or under floors can corrode or loosen — how to detect concealed pipe leaks explains the checks.
- Faulty fixtures: Running toilets, leaky taps, or shower mixers often cause leaks.
- Poor workmanship: Bad tile installation or poor waterproofing during a past renovation.
How to Check If Your Bathroom’s Waterproofing Has Failed
You don’t always need technical tools to spot a problem. Here’s how to inspect your bathroom:
- Bathroom tiles: Check tiles near the basin, bathtub, and standing area for cracks or damage, and replace any that show signs of wear.
- Grout: Inspect grout lines closely — they should be hard, not powdery or crumbly. Moldy or soft grout needs to be replaced or topped up.
- Shower wall and floor junctions: Building movement is a major cause of leaks here. Replace silicone that looks mouldy or worn out.
- Shower fixtures: The joints between the shower drain and tap head studs should be sealed with silicone — disassemble the fixtures to check if seals are intact.
- Signs of poor waterproofing: bubbling or peeling paint on the ceiling or walls, drummy-sounding tiles, water stains on the ceiling, black mould on tiles and grout, and a musty odour that won’t go away.
If you spot any of these signs, it’s worth engaging a leak-detection professional before the damage spreads further — especially since Singapore’s building regulations set specific requirements for waterproofing in wet areas.
Fixing Bathroom Leaks Without Removing Floor Tiles
Many bathroom leaks can be stopped without the cost and disruption of hacking out your tiles — this is the idea behind no-hacking waterproofing. Here are five non-invasive fixes:
1. Fix Cracked Grout
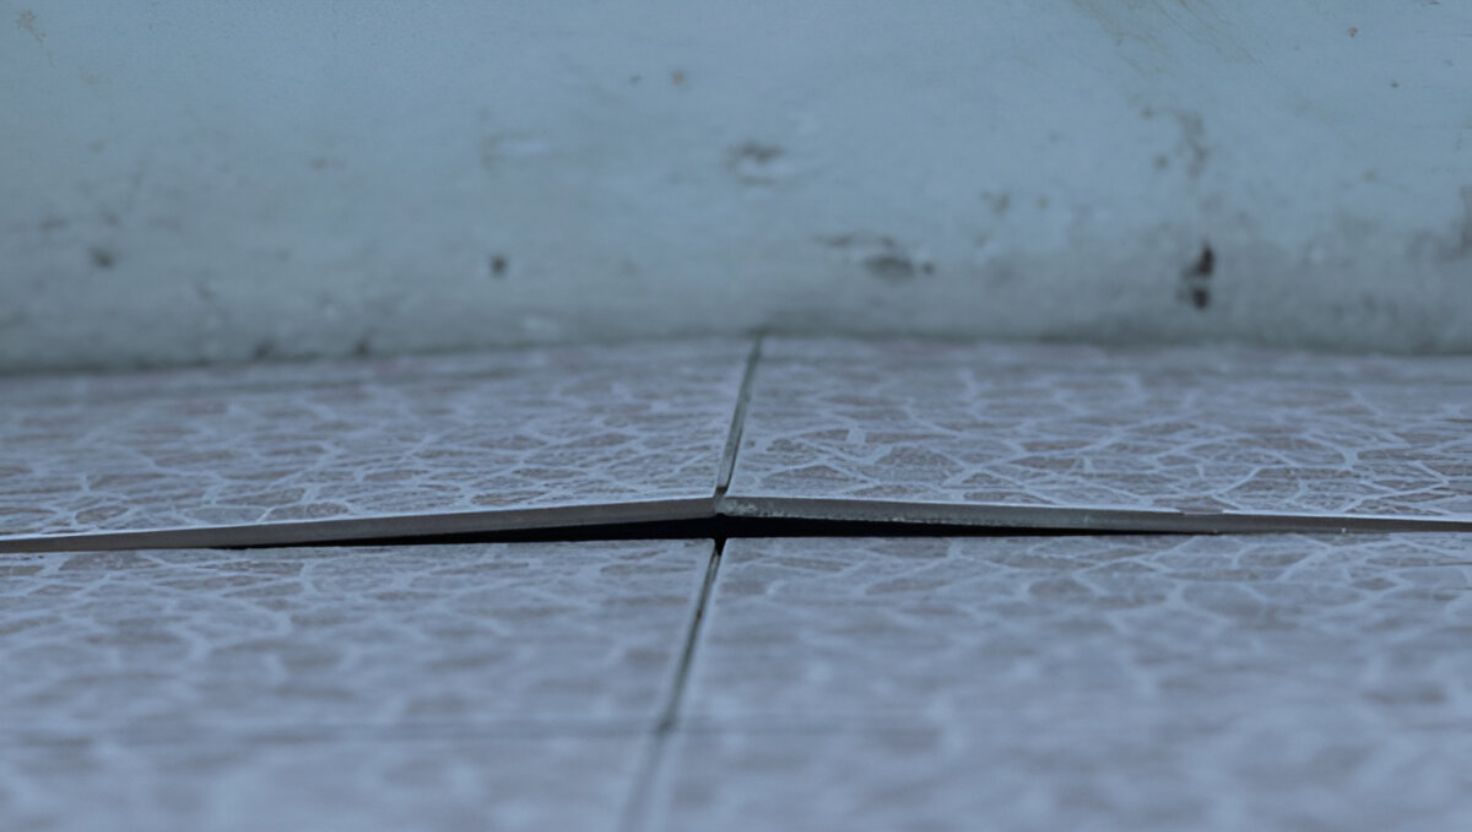
Scrape out old, cracked grout with a small saw or utility knife, clean and dry the area, then apply waterproof grout with a float and remove the excess with a damp sponge. Run water over the repaired area afterward to check for leaks. Reapply grout roughly every 8 to 16 years as routine maintenance.
2. Replace Silicone Sealant
Scrape away old sealant around edges, fixtures, and corners without scratching the tiles, then apply a new mould-resistant, wet-area-rated silicone once the surface is clean and dry. Smooth it with a spatula and wipe away excess before it sets.
3. Tighten Plumbing Connections
Loose fittings around the faucet, showerhead, and pipes are an easy source of leaks. Tighten connections gently with a wrench (over-tightening can crack porcelain), replace worn washers or O-rings if the leak persists, and use plumbing tape for extra assurance.
4. Use a Shower Repair Kit
For recurring shower-area leaks, a shower repair kit lets you apply a sealing compound or tape directly to the affected area without disturbing tiles. Let it cure fully before testing.
5. Replace Worn Shower Door Seals
Pull out damaged door seals, clean the frame with a mild cleaner, and install new seals matched to your door — ideally every 1 to 2 years.
Ignoring these small leaks can lead to structural damage as water weakens walls and floors, mould and mildew growth with associated health risks, and repair bills that balloon once tiles need full replacement.
Advanced Professional Repair Methods
When DIY fixes aren’t enough, a professional bathroom water leakage repair service in Singapore typically uses one of these non-destructive or structural methods:
Polyurethane (PU) Injection Grouting
Ideal for water seeping through small cracks in walls or floors. A waterproof resin is injected directly into the crack; it reacts with water to form a strong foam that blocks the leak path from inside. It’s quick, clean, and doesn’t require breaking tiles — which makes it especially suited to HDB flats, where hacking the floor isn’t always allowed.
Flood Infusion Treatment
Best for light-to-moderate seepage. A waterproof chemical is applied over the bathroom surface and seeps into the concrete, filling small pores and cracks. Once cured, it forms a protective layer without any hacking or tile removal.
Hacking and Re-Waterproofing
The most complete and long-lasting solution for serious or old leaks. Old tiles and cement layers are removed to expose the membrane, a new waterproof layer is applied, and fresh tiles are laid. It costs more and takes longer, but gives a brand-new waterproof base. In HDB flats, this requires a renovation permit and an HDB-registered contractor.
How Professionals Identify Hidden Leaks
Specialists use specialised tools rather than guesswork to pinpoint the exact leak source:
- Thermal imaging cameras: Spot damp or wet areas behind tiles and walls through temperature differences.
- Moisture meters: Measure how much water is inside walls, floors, or ceilings.
- Dye testing: Traces where leaks originate, especially in pipes or around the toilet.
- Pressure testing: Checks whether pipes can hold normal water pressure without leaking.
Toilet-Specific Leaks: Causes and DIY Fixes
Toilets are one of the most common sources of “bathroom” leaks in HDB flats. The top causes are:
- Defective wax ring seal: The watertight seal between the floor drain and toilet bowl wears out over time, especially in older flats, leading to water pooling around the base or ceiling stains in the unit below.
- Cracked toilet bowl or tank: Hairline cracks from age or impact grow over time and cause persistent leaks.
- Loose or old water supply line: Connections loosen or corrode, causing water to trickle from the joints.
- Faulty flapper valve: A valve that doesn’t seal properly lets water run continuously from tank to bowl.
- Worn pipe joints or sewer line issues: Harder to diagnose without professional help; look for wet areas along nearby walls, bad odours, or leaks that continue after fixing other causes.
Common DIY fixes you can try before calling a professional:
- Fixing a leaky flapper valve: Turn off the water supply, flush to empty the tank, check the flapper for wear or mineral buildup, clean or replace it, then test for leaks.
- Tightening loose water connections: Inspect the supply line, carefully tighten bolts and nuts with an adjustable wrench (don’t over-tighten — it can crack porcelain), and test again.
- Replacing a broken wax ring: Switch off the water supply, drain and disconnect the toilet, remove the old wax ring, clean the flange, fit a new ring, reseat and bolt the toilet, then test for leaks. This is more involved — if you’re not confident, it’s worth hiring help.
Call a professional plumber or waterproofing specialist if DIY fixes fail, the leak is in a hidden or hard-to-reach area, there’s serious water damage to neighbouring units, or the leak involves the main supply pipe. Minor toilet repairs in Singapore typically cost SGD 40–80 for plumber call-outs.
Regular maintenance helps prevent future toilet leaks: do weekly visual checks for water at the base of the toilet, inspect the flapper, fill valve, and float mechanism monthly, and do a quarterly deep clean of mineral buildup. Watch for phantom flushes, a toilet that runs continuously, rocking or instability when seated, or ceiling discolouration in the unit below — all early warning signs of a developing leak.
Hidden Leak Problems Specific to HDB Bathrooms
HDB bathrooms are wet areas used daily, with pipes running inside concrete walls and floor slabs — so small failures can stay hidden for months before damage becomes visible. According to the Ministry of National Development, HDB received around 21 ceiling leakage complaints per 1,000 flats each year between 2014 and 2021, and most originate from bathrooms. The most common hidden issues specialists deal with are:
- Concealed pipe leaks inside walls or floors: Caused by rusting metal pipes, poorly sealed joints, high water pressure, or renovation hacking that damaged a pipe. Signs include damp walls, bubbling paint, a sudden jump in your water bill, a water meter that keeps moving with taps off, and brown ceiling stains below.
- Failed waterproofing membrane under tiles: In flats over 10–15 years old, the membrane often weakens due to age, poor past workmanship, missing ponding tests, or cracked grout — letting water under the tiles even when the surface looks dry.
- Floor trap and waste pipe leakage: If the seal around the floor trap fails, moisture spreads under tiles with a damp smell near the drain, even without visible puddles.
- Cracked tiles and damaged grout: Hairline gaps let water travel below tiles and sit in the slab, loosening tiles and weakening adhesive over time.
- Toilet bowl seal failure: A cracked or shifted seal leaks every time you flush, producing a damp smell and soft tiles near the toilet base.
- Interfloor slab leakage between neighbours: Water from the upper unit seeps through the concrete slab and appears on the lower ceiling — a common source of neighbour disputes. Under HDB guidelines, both upper and lower unit owners typically share responsibility, and HDB’s Goodwill Repair Assistance scheme may apply in some cases.
Ignoring hidden leaks lets damage spread — concrete weakens, mould grows, paint peels, electrical risk increases, and repair costs can double or triple due to structural drying and repainting. Specialists tackle this with leak detection and diagnosis (thermal imaging, acoustic detectors, moisture meters, pipe inspection cameras), fixing concealed pipe leaks (chiselling and replacement, pipe rerouting, or re-waterproofing and patching), and full bathroom waterproofing solutions (PU injection crack sealing, full hacking and retiling with a new membrane, or advanced self-healing coatings).
Typical 2026 repair costs in Singapore:
- Leak detection (general): S$100 – S$300
- Repair exposed pipe leak: S$80 – S$200
- Concealed pipe leak detection and minor repair: S$120 – S$500
- Bathroom water leak repair (minor): S$200 – S$1,000
- Concealed pipe replacement and reinstatement: S$300 – S$1,500+
- Full waterproofing and retiling: S$3,000 – S$5,000+
- Structural waterproofing / crack injection: S$400 – S$800+ per metre
Common Mistakes to Avoid in Bathroom Waterproofing
Many waterproofing failures trace back to the same handful of avoidable mistakes:
- Not getting prepared: Forgetting to clean the surface properly before applying waterproofing material, or not sealing pipes and drains tightly, means the layer won’t stick or last.
- Picking the wrong product: Floors and shower walls need different materials — using the wrong sealant (such as a PU sealant on an area that needs a membrane) leaves weak spots.
- Applying it the wrong way: Not using enough layers on the floor, or missing corners, joints, and fixture areas, leaves gaps for water to seep through.
- Not letting it dry properly: Waterproofing needs adequate curing time (commonly 30 minutes or more per layer) before tiling — rushing this step weakens the bond.
- Ignoring structural points: Skipping a proper floor slope toward the drain, failing to test for leaks by flooding the area, or not inspecting the work carefully can all leave hidden weak spots.
- Not following building requirements: Skipping Singapore’s building codes for wet-area waterproofing can multiply your eventual repair cost up to 5 times, and risks water spilling into neighbouring homes.
- Not getting help from an expert: Waterproofing without the right know-how is one of the easiest ways to make costly mistakes — when in doubt, bring in a specialist.
How Long Bathroom Waterproofing Takes
There’s no single answer — the duration depends on several factors:
- Scope of work: The number and size of bathrooms, and how poorly maintained or vacant the unit has been, all affect how much restoration work is needed before waterproofing can even begin.
- Availability of materials: If materials are already on hand, work can start almost immediately; if they need to be sourced, this adds time.
- Type of materials: Ceramic, porcelain, and stone flooring each need different sealants, and rarer materials can be harder to source.
- Budget: Homeowners managing costs in stages (e.g. working only on weekends) naturally extend the timeline compared to those who want the job done as fast as possible.
- Availability of professionals: Demand spikes during the rainy season, which can mean longer wait times and higher rates.
As a general guide, simple fixes like a flapper valve or seal replacement take a few hours; moderate repairs such as PU injection or flood infusion take one to a few days; full hacking and re-waterproofing can take two to five days or more to allow proper drying and curing.
How Long Does Waterproofing Last?
Properly done bathroom waterproofing typically lasts 5 to 7 years, sometimes up to 8–15 years depending on quality and usage, with most professional contractors offering a 3 to 5 year warranty. Lifespan is affected by:
- Humidity: Higher humidity levels, or living near the sea, puts more stress on the waterproof layer and can shorten its life to around 3–5 years.
- Unresolved leakage: If the original source of a leak isn’t fixed before waterproofing, the layer’s lifespan can drop by 3–4 years.
- Structural integrity: Cracks or peeling paint reduce how long the waterproofing can hold — good structural condition can extend life toward 7 years.
- Method used: Waterproof primers and paints, crack injections, and membrane systems all have different expected lifespans.
Preventive Maintenance
Once your bathroom leak is fixed, simple habits keep it that way:
- Check silicone and grout every six to twelve months and replace them when they look old or cracked.
- Use a shower screen, mop up standing water, and keep the bathroom dry and well-ventilated.
- Inspect pipes and fixtures regularly for rust, corrosion, or loose fittings.
- Avoid harsh acidic cleaners, which eat away at grout and silicone seals and cause leaks to return faster.
When to Call a Professional Bathroom Water Leakage Repair Service
Call in a specialist when water is seeping between floors in an HDB flat, pipes are hidden inside walls or under tiles, DIY fixes have failed repeatedly, or you keep seeing dampness, mould, or cracks that come back. Our bathroom water leakage repair service starts with a proper inspection of the affected area.
At Allseal Waterproofing PTE Ltd, we inspect your bathroom, find the exact leak source, and repair it using proven methods like PU injection or full re-waterproofing — sealing cracks, fixing broken joints, and making sure your bathroom stays completely watertight. Don’t wait for the problem to get worse — call Allseal today for a free inspection and lasting solution.
Frequently Asked Questions
How long does it take to fix a bathroom water leak in Singapore?
It depends on severity. Small leaks like dripping taps or loose seals usually take a few hours. Bigger leaks needing waterproofing or hacking can take two to five days because materials need time to dry and cure properly.
How much does it cost to repair a bathroom leak in Singapore?
Small fixes like changing silicone or seals can cost under $100. Non-hacking methods like PU injection or flood infusion usually run S$300–$800. Full hacking and re-waterproofing can exceed S$1,000 depending on bathroom size.
Can I use waterproof paint to stop bathroom leaks?
Waterproof paint only protects the surface — it won’t stop leaks coming from inside walls or under tiles. If water keeps returning, you need proper waterproofing to fix the real problem.
Why do bathroom leaks keep coming back after repair?
Usually because only the surface was sealed while the deeper waterproof layer stayed damaged, or the wrong materials were used, or the area wasn’t fully dry before sealing.
Is hacking always needed to fix bathroom leakage?
No. Many leaks can be sealed from the inside using non-invasive methods like PU injection or flood infusion. Hacking is only necessary when the waterproofing layer is very old or badly damaged.
How do I know if my upstairs neighbour’s bathroom is leaking into mine?
Look for damp patches or stains on your ceiling or walls near the bathroom, with paint that bubbles or peels. If this happens, both units should contact HDB to arrange a joint inspection, since inter-floor leaks usually affect both sides.
Are bathroom leaks covered under HDB maintenance?
Some minor leaks may be covered if reported to HDB, but bigger problems usually need private repair — it’s best to check with HDB directly.
Can I shower normally right after a waterproofing treatment?
No — wait at least one to two days before using the bathroom again so the waterproofing has time to dry and harden. Using it too soon can break the seal and bring the leak back.
Wrapping Up
Fixing a bathroom leak may feel stressful, but it’s rarely complicated once you understand the cause. Find where the leak starts, choose the right repair method — whether a simple seal replacement, a non-hacking injection method, or full re-waterproofing — and keep up with simple maintenance afterward. A dry, well-maintained bathroom not only looks better, it protects your whole home and your neighbours’ units too.